Also see feeding mealworms
and how to make your own feeder
I wouldn’t say raising mealworms is FUN, but it’s not too hard and can save you a lot of money.
 QUICK TIPS for maximum productivity:
- Place large mealworms in a shallow plastic sweater container.
Cut a hole in the top for ventilation and use a hot glue gun
to adhere window screen to it to keep critters and moths out. - Add 2-3″ of bedding/food:
- wheat bran, or a 3:1 ratio of wheat
bran to dried skim milk, or - 4 layers: 1/4″ layers of chicken mash (non-medicated)
separated by layers of burlap or newspaper, or - 10 parts oat or wheat kernels, 10
parts whole wheat flour, 1 part wheat germ
or powdered milk; and 1 part brewers yeast.
- wheat bran, or a 3:1 ratio of wheat
- For moisture, add a small wedge of cabbage or half a potato.
Put it on top of a plastic lid or newspaper to keep bedding dry. Replace vegetable at least weekly or if moldy. - Ideally keep at around 80°F (room temperature
is fine too) and around 70% relative humidity. Use a moistened
sponge in a baggie/ open container (open side up above grain) for additional moisture. - Periodically (e.g., every 1 to 2 weeks) sift out beetles from bedding that will contain the eggs/tiny worms. (The beetles may eat the eggs.)
- Once worms are big enough, sift frass (waste) and bedding out once a month, dispose of in garden, wash and dry container, return worms and add new food.
Jump to: timetable
and life cycle , stock, container, ventilation, temperature, light, moisture and relative
humidity , food, supplements, cloth/newspaper
covering, cleaning, separating
out worms , colony cycling/maintenance, sifting, storage, freeze-roasting, dusting, uses, nutritional value, Problems: pupa or beetle die off | mites | moths, other
worm species, raising superworms, and comments on my experiences so far.
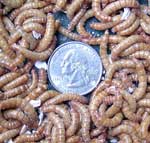
Bluebirds relish mealworms, which are the larvae of the darkling beetle (Tenebrio molitor Linnaeus, also called yellow mealworm or golden grub). Bluebirds will eat larvae (worms), pupae and beetles (before the shell gets hard), but prefer the worm form.
You can buy mealworms from a pet store (expensive – price depends on quantity but figure about $25/1,000) or mail order (less expensive – about $6-16/1,000 – see list of suppliers).
You can also raise them yourself (perhaps for as little as $0.10/1,000).
Raising meal worms is fairly easy because these creatures are the insect equivalent of a weed. It saves a lot of money and is interesting, but I wouldn’t classify it as long-term fun. It requires patience as it takes months to get them started (about 3 months
for your first beetles, depending on temperatures and the size of starter worms). It also requires discipline to do harvesting, separating,
replacing food, cleaning out waste, etc. Some people think it is not worth the bother.
A mealworm colony does not smell if properly cared for. (Dead mealworms and crapped up bedding material reek.) Mealworms don’t carry any diseases harmful to humans, although one study indicated that they may act as an asthma
sensitizing agent. One farmer indicated she experienced severe upper respiratory infections after handling mealworms and was concerned there might be a connection. She then used a mask and gloves when handling them, but eventually decided to abandon farming. Another had what appeared to be an allergic (respiratory) reaction to the farm – possibly the frass (but not to mealworms stored in a refrigerator.)
Timetable and Life cycle: Tenebrio molitor have an egg, larva, pupa and beetle stage. Depending on food and temperature, it takes about hundred to several hundred days for them to complete their life cycle. Therefore, if you want worms in the spring, start your colony in November or December. For each 20 beetles, you should get about 350 adult mealworms in 200 days. Here is the life cycle if the colony is kept at room temperature (~72 F.) I found it took much longer for the pupa to convert to the beetle stage.
| Stage | Time* |
| Egg Incubation | 4-19 days (usually 4-7). Another source says 20-40 days |
| Larva | 10 weeks. Visible after about a week |
| Pupa | 6-18 (18-24?) days |
| Beetle and Egg Laying | 8-12 weeks (followed by death). Egg laying starts 4-19 days (average 12) after emergence |
* time depends on temperature, relative humidity, food, etc. Different sources report different time frames.
- Eggs hatch into larva.
- Larvae burrow below the surface of the grain and undergo a series of molts (10-20, average of 15), shedding their exoskeleton (looks like Cornflakes).
- The last molt occurs about three months after the egg stage.
Newly molted worms are white, and the exoskeleton has not hardened so they may be more digestible. - The fully grown larvae (worms) are golden brown and 0.98-1.38 inches long, with about 200 to an ounce.
- The larvae come to the surface. They turn soft and plump, stop moving, curl into a “C” shape, and then transform into naked white pupae that turn yellowish brown after a day. They look sort of like alien grubs. The pupae don’t eat or move much. If you purchased your worm stock fairly large, this transition may happen in a few weeks.
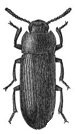 After 6 – 18 days (7-24 days or more), the pupae metamorphose into beetles. At first the beetle is white/light beige with a soft shell, and then it darkens and hardens to red, brown, and finally turns dark brown/black after about 2-7 days. The beetle is about a half to three quarters of an inch
long and slightly flat. Males and females are indistinguishable. They can not fly, but they can move very quickly. I’ve noticed some do not develop property (e.g., wing covers) and look ragged. You might want to use these as bird food.- Beetles lay their eggs 9 – 20 days after emergence. They lay for two or three months, and then die. Each female beetle lays about 275 tiny, bean-shaped white eggs – about 40 per day. The eggs are seldom seen because they are sticky and rapidly become coated in substrate. They are about the size of a period at the end of this sentence – you would need to line up 20 to equal an inch. [Note: Birds may eat live beetles if offered.]
- Egg incubation takes 4-19 days (average of 12.)
- The cycle begins again as the eggs hatch into tiny whitish larvae, which may not be easy to see for several weeks.
- In 4-6 weeks they will be about 0.5″ long.
Stock: Get at least 100-1,000 large mealworms from a mail order supplier or pet store; or from feed, grain, or meal in a barn/granary.
Do not buy “giant” mealworms for breeding (or feeding), as they may have been treated with an insect growth hormone to discourage them from morphing into beetles, so they will grow larger. If giant mealworms do morph into beetles, they will be sterile.
To jump-start your farm, ask you local pet store if they have any adult beetles you can get.
Container: As long as the larvae are 1″ or more below the top of the container, they can’t get out. Mealworms may thrive more in a container with a large surface area. Some people keep the container(s) in a laundry room, garage or basement.
A clear container will let you see how much frass (waste) has accumulated. Use a shallow (e.g., 2-5 gallon capacity,
6-10″ deep x 24″ long, or 10″ x 17″ x 6″) plastic container.
A shoe box size or sweater storage container (Rubbermaid, Sterilite, etc.) will suffice. A pail can also be used.
If you are going to separate the stages, a four drawer container like the kind found at Wal-Mart or Target can be used. A 64 quart Rubbermaid container holds 50,000 to 100,000 larva. L Cooksey found that a smooth bottomed container doesn’t get as moldy as a container with ridges on the bottom.
Some people use wooden containers, but if the sides are too rough, the worms may be able to climb the walls.
A larger surface area may improve survival by dissipating heat. Too many worms stored in too small a container will overheat and die (e.g., 5,000 worms in a 2 gallon pail=dead worms.) The mealworms should probably be only 3-4″ deep.
Ventilation and Cover: Ventilation prevents mold growth. Darklingbeetles do have wings, but can’t fly. Some commercial farmers do not cover their bins. Since mice, rats, cockroaches and some spiders will eat mealworms, the container should be kept closed. (One bluebirder in Texas found a scorpion in with her mealworms!) A tight fitting cover will also keep flour
and grain moths out.
Options:
- If the container comes with a plastic cover, drill holes in it. If condensation forms on the inside of the lid, you need more holes.
- Cut a section out of the middle of the lid and use a hot glue gun to glue some fine window screening material to the inside of the lid, around the hole.
- Make a cover for the container out of window screening.
Temperature: The ideal temperature to maximize growth is 77-81ºF, but
~ 72-74ºF is also good. Mealworms do reproduce in temperatures
ranging from 65-100 F, but temperatures above 86ºF negatively
impact growth and development (inhibiting pupation). The
duration of the pupal stage will depend on temperature. It is six
days at 91.4ºF, seven days at 80.6ºF, ten days at 75.2ºF
and thirteen days at 69.8ºF.
Temperatures below 62ºF may halt reproduction. In cold temperatures the larval stage can last two years. Chilling worms and then re-warming them may significantly delay pupation. Prolonged exposure to temperatures below 40ºF may kill the worms.
I am using a 500 watt rheostat controlled ceramic reptile heater suspended over the container to keep temperatures high enough in my drafty home. The heater is in a metal hood, and sits on top of the Rubbermaid container, on a circular metal window screen hole. Because it dries everything out, I put the cabbage/potato wedges underneath fabric, and have several plastic containers filled with water sitting on top of the bedding.
Light: Consistent with the name darkling beetle, they prefer the dark. Keep the container out of direct sunlight. However, one source indicated that if mealworms develop faster when provided with light. To obtain a supply of adult beetles in the fall, the usual hibernation period of the dark mealworm (a different species) can be prevented by exposing the fully grown larvae to continuous light.
Moisture and Relative Humidity: Mealworms do require moisture. Too little moisture slows growth and reduces size. Too much can produce mold.If larvae are provided with dry food, they can survive and produce one generation a year. If they are provided moisture, they will undergo six generations per year will be fatter.
Beetles lay more eggs when the relative humidity is higher – ideally 70% (55-80% is good). In one experiment, at a relative humidity (R.H.) of 20%, beetles laid an average of 4 eggs each, but at 65 percent R.H., they laid an average of 102 eggs each.
Adult worms also become more active between 90 – 100% R.H. Keeping the culture moist also prevents cannibalism. More is not better. If you put too much in, or leave it too long, it will get moldy or become a gooey mess.
- Add a chunk of cabbage, raw potato (half a potato, or a chunk about 1″x3″), a slice of bread (which the mealworms will also eat), romaine lettuce, kale (high in calcium and inexpensive), yam (also nutritious) or apple slices (1/4 of an apple is enough for 1,000 mealworms, once or twice a week – I find apples get moldy too quickly). Some people use celery (e.g., bottom end of bunch), broccoli stems, carrots (grated carrots on a plastic lid), banana peels, or asparagus chunks. Cabbage leaves do not get as moldy as some other choices. Cover cabbage etc., with a cloth to keep it from drying out if you use a heat lamp. A crust of bread (replaced when dry) can also be laid face down on the bedding. You may wish to wash/peel vegetables first to prevent the introduction of pesticides.
- Place potato/apple slices cut side up, even with top of bedding. By putting the skin side down, you keep the bedding/dry food from getting too moist.
- Try kiwi skin with about 15% of fruit still in it (after scooping out the rest with a spoon for your own enjoyment). A.M. Prendergast found that it made mealworms grow about 3 times fatter and 30% longer in just 2-3 weeks versus wheat bran alone. The worms also use the skin as a “cave” as it dried and curls up.
- To make them easier to replace (every 2-3 days or weekly), put vegetable on a little
plastic lid, tinfoil pie plate or a piece of cardboard, or stick a toothpick in it. Replace immediately if mold appears. - If you use burlap or newspaper, you can spritz it lightly with water on a daily basis. Do not soak, and do not wet bedding. You can also put in a moist (not wringing wet) paper towel, changing it daily. You can put down a piece of aluminum foil under the dampened
burlap/paper to prevent grain from getting wet. - You may not want to use Fluker’s “Cricket quencher,” a gel polymer that insects suck water out of – one person raising mealworms experienced a massive beetle die-off after introducing it, but the issue may also have been a bark log tunnel she introduced (purchased a PetSmart.) Fluker instead recommends a Fluker Orange Cube.
- Small amounts of moist cat food (like Tender Vittles) can also be used, and will provide extra protein.
- Placing adult beetles on moist blotting paper overnight may increase egg production.
- Put a moist sponge INSIDE a plastic baggie (open) and lay the baggie on the bedding.
- Place a small but tall (so they don’t drown) bowl filled with water in the middle of the farm to increase relative humidity. A sponge can be placed in the bowl to increase the moist surface area. Fawzi
Emad uses a moist sponge wired to the container lid. You can also put the bottom of the sponge in a plastic baggie (to prevent the meal from getting wet and moldy) and stand it upright in the corn or oatmeal. Re-wet the sponge weekly, and wash it when needed.
Food/Substrate/Bedding: The more nutritious the food, the more nutritious the mealworms will be. Layer it in 2-3″ inches deep. Replenish the food often, as the worms eat a lot. Change the food out about once a month. Feed the beetles too (same stuff). I mix up a big batch with supplements and store in it a plastic bin with a screw top lid so I don’t have to worry about flour moths and other critters getting into it.
Fine particles (fine wheat bran, corn meal, chick starter) make it easier to sift out large mealworms. Larger particles (e.g., rolled oats) with larger worms make it easier to sift out frass so you don’t waste food. Newly hatched worms are so tiny that they will go through a screen with the frass. See cleaning.
You can buy some of the food items from an animal feed store or bulk food store. Commonly used food sources are listed below. They will also eat corn cobs (hiding inside):
- wheat bran, red and/or white (about $7.00/20 lb. bag at a feed store) or chaff. Coarse or fine. Put it in 1.5-2″ deep. Preferred by some breeders.
- rolled oats (oatmeal – uncooked, old fashioned – not instant. I don’t like using oatmeal as it is difficult to sift out the worms).
- oat bran
- cornmeal (not cornSTARCH)
- chick (poultry – chicken or pheasant & turkey) starter/mash – very nutritious. Available from a feed store. Get NON-MEDICATED. You can put it in four layers each of 1/4″ of mash covered by burlap. Easy to sift. 55 lb. bag costs about $11.
- ground dry dog or cat food encourages pupation. It can also be given to worms prior to offering them to birds to increase protein content.
- leftover low sugar cereal
- birdseed (e.g., milo)
- wheat flour (whole wheat for added nutrition)
- grain mixture:
- 10 parts oat or wheat kernels,
10 parts rolled oats (oatmeal) or whole wheat flour; 1 part wheat germ or powdered milk; and 1 part brewers yeast. - 10 parts wheat feed, 10 parts rolled oats, 2 parts brewers yeast rolled oats 10 ounces.
- 10 parts oat or wheat kernels,
A few scraps of cloth or wrinkled paper layered with the bedding will prevent
the meal from packing too solidly.
Supplements: You can add the following to the dry food/bedding: wheat germ, finely
ground egg shells or cuttlebone (for calcium), soybean meal, Wombaroo insectivore mix, fish flakes, fine mouse cubes, bone meal, graham (whole wheat) flour, and dry brewer’s yeast (provides proteins and trace elements essential to the insects’ growth and makes larvae grow more. Brewer’s yeast can be obtained at health food stores. It’s pricey, so you might want to buy it in bulk at a feed store or online. You can sprinkle the vegetables/fruit with calcium and vitamin supplements to add nutritional value. Experiments where skim milk (calcium source) was added to wheat bran (1:3 or 1:2 ratio) yielded better growth than wheat bran alone.
Cloth or newspaper covering: You can partially cover the food surface (about 2/3)
with several layers of newspaper, brown grocery store bags, paper towels, or a folded piece of cloth. Leave space between the paper and edges of the container.
Worms will crawl between the newspaper layers to pupate, which makes it easy to collect them.
The beetles will lay eggs on cloth. However, it is difficult to get the beetles off the cloth when maintaining the farm. Beetles will also lay eggs directly on the food source.
Or you could put thick, clean, dry hunk of bark on top of the bedding. The beetles will lay eggs on it.
Separating out worms![]() : To remove worms to offer to birds or to separate them from eggs and beetles you can:
: To remove worms to offer to birds or to separate them from eggs and beetles you can:
- use a stainless steel sifter
- put a sheet or newspaper or grocery store bag or a plastic lid on top of the colony. The worms will crawl under it in a few hours. Repeat until you have taken all worms out and then replace the bedding.
- hold back on moisture for a couple of days. Then put a lettuce leaf, moistened piece of bread, or damp Bounty paper towel or blue paper shop towel (rung out – re-wet and ring out as needed) in the container on top of the bedding. The larva will cover the bread or lettuce. Shake them into a container until you get what you need.
Cleaning: Remove dead mealworms or dead beetles. Dead larvae turn black. Dead pupae turn brown and shrivel up. Deformed beetles die early. Other dead beetles stop moving and their antenna crinkle up.
Frass: As the mealworms consume the bran, a fine, dusty or sandy residue will settle out on the bottom. Eventually, shed exoskeletons and waste products (frass) will build up, and a slight ammonia odor may be detected. That means it’s time to sift the grain to separate the worms and adult beetles (don’t throw out tiny larvae or eggs); wash the container, add new grain, and return the worms to the container. You’ll probably need to do this at least 3 times a year. If the frass builds up too much, mealworms may turn gray and get black stripes and then die.
The frass (waste) can be used as fertilizer for flowers or vegetables.
You might want to save the frass in a separate container for a bit and put some lettuce/cabbage to see if there are any mealworms you can separate out.
The reason you need to sift out the beetles is they may eat the eggs.
Sifters: You can make a sifter with #8 (1/8″) hardware cloth or nylon reinforced screen tacked onto a wooden frame. If a sifter is made to fit in the bottom of the mealworm container, the frass will fall through the sifter, making it easier to clean the container. The fine hardware cloth may be difficult to locate (try a hardware store), but you can also buy a wire mesh basket from an office supply store, or use a device like a Double Over-the-Sink Colander with extendable arms (available at Linens N Things).
Colony “Cycling” or Maintenance: Some farmers leave worms, beetles and eggs
all together in one container. If you do not separate them, do not change the bedding after the worms turn into beetles, as it contains eggs of future worms. Leave the bedding until
you can see and sift out the small mealworms. You really should go through the entire farm about 3 times a year to separate out the beetles into their own container and add fresh bran. Too many adults in the container can eat eggs and reduce the colony’s production.
Others farmers separate them out, since larvae and beetles might chow on the inert pupal stage, and beetles may eat pupa/eggs. If you start a new culture every 2-4 weeks, you will always have all life stages, they will be about the same age, and you won’t run out of worms.
To separate the beetles out, you can catch the live ones easily by providing apple slices. They swarm to the apple – just lift it and shake off swarm after swarm. The handful that are left are easy to pick up/spoon out as they surface.
Set-ups:
- The best set up may be to have two containers that fit inside one another. Put the beetles in Container A, and put small holes (smaller than beetles, bigger than bran) or screen the bottom of that container. Sit Container A inside Container B. Every 2 days to 2 weeks, shake out the bran (with eggs) out of Container A into Container B. The beetles stay behind. Add more food and moisture sources as necessary to A as necessary. Once you’ve collected enough bran and eggs in the B, transfer the contents to a “nursery” container (Container C) with a source of moisture and let it sit for 30-40 days, and start over again. You can cover Container C bedding with a piece of newspaper or cloth that is spritzed lightly with water on a daily basis. I don’t know how well this set up would work if you have a cloth with the beetles on it, as they may be laying eggs on the cloth.
- Use three or more containers.
Container A can be a big Rubbermaid bin with a lid. Containers B and C can be open shoe box size containers that sit inside of Container A. Or you can use the multi-drawer stacked containers, or simply three separate containers.- Pull pupae out by hand of Container A (it only takes a few minutes if you
do it every 2-3 days) - Put pupae in Container B (no food needed.)
- Let adults emerge before disturbing. Pick out the beetles out of Container B every couple of days (you can use a spoon) and put them in Container C with some bran and folded cloth they can lay eggs on. They are easy to see because unlike the pupae they have wiggling legs.
- After 2-8 weeks, take the beetles out of Container C and feed them to the birds/discard. Periodically remove any dead beetles.
- Let the eggs in Container C hatch. For the first couple of weeks/months you can hardly see the larvae. Tens of thousands fit in a shoe box size container. Disturb the culture as little as possible during this phase.
- When they are big enough to sift out from the grain, separate larvae out with a sieve or by hand and put them in Container A or more containers if you want to sort by age and size.
- Pull pupae out by hand of Container A (it only takes a few minutes if you
- One person has a simple set up in a collection of 12 used takeout containers, each about 5″x7″x3″ deep. The beetles are in the first one. Every couple of weeks she sifts the egg-containing bran and beetles into two separate clean empty containers. Four or five months later this provides a batch of mealworms that are pretty much all the same size.
Storage: Worms that you don’t want to reproduce can be kept in a closed container (with holes drilled in it) in the refrigerator. Lay a paper towel on top to prevent condensation. At 38ºF, or even 45-50ºF they will last along time (months) in a semi-dormant mode. One source says larvae can stay alive 80 days at 23ºF. They will not pupate in the refrigerator. See more
information on storage.
Freeze Roasting: Here is the technique Jeff Kellogg uses to freeze dry mealworms.
Roasted mealworms do not require refrigeration, and should last more than a year.
- Get 10,000 large mealworms
- Put them in two large plastic containers on arrival and put them in the freezer.
- Once frozen and dead, heat up the grill on the lowest setting.
- Put the mealworms into a large disposable aluminum roasting pan, after sprinkling some corn meal into the bottom of the pan. This prevents them from sticking to the bottom.
- Put them on the grill, close the lid, and let them sit there for about 4-5 hours.
- Again, put the grill on a very low setting(maybe only one burner on low) and shake them up every so often. They will turn brownish, but once they’re cooked, they won’t turn black and disgusting if left out in warm weather.
- Once cooked, put them back in the freezer and use them as normal. No smell, no feeding, no problem.
Do not use a microwave. If you cook them indoors in the oven, it gets a little smelly.
Dusting: You can “dust” the outer part of mealworms with powdered mineral or vitamin formulations (e.g., Powdered Calcium [Ca2+] or calcium-vitamin combinations) prior to feeding it to an animal. Put larvae or beetles in a baggie, and gently shake them to coat them with the mineral-vitamin powder. Shake off excess before feeding to animals.
Uses: Mealworms are a good source of high quality protein. Some people do “gut loading” (offering extra food or protein to the mealworms) two days before feeding to animals. Larvae have a relatively hard exoskeleton made up of indigestible proteins and chitin. Recently molted mealworms may be softer and more digestible.
You might consider selling excess worms to a local pet store or a zoo. If you sell them, count out 100 mealworms by hand and weigh them on an accurate postal scale. Then figure out what the weight is for whatever quantity you are selling.
- Bird food – caged and wild. Includes many songbirds and chickens, turkeys, guinea fowl, peafowl, quail, chukar, pheasant, and domestic ducks. Small birds like finches prefer 0.5″ size (worms 4-6 weeks old). One
source indicates that because of their high fat content they should not be fed as a main part of any diet. - Excellent fish bait. Mealworms last on the hook longer than many other kinds of live bait. They are one of the best baits for bluegill, perch, trout, whitefish and many pan fish, and for ice fishing.
- Tropical fish. They especially enjoy newly molted larvae.
- Turtles (aquatic turtles of all sorts, box turtles, tortoises), reptiles (sailfin lizards, chameleons, fringe-toed lizards, basilisks, water dragons, basilisks, anoles), frogs (e.g., dart), toads, salamanders and newts. See dusting – it’s a good idea to dust mealworms fed to desert or basking reptiles with a vitamin D3 precursor and a calcium supplement
like Calsup®, especially when D3 light lamps are not used. - Small mammals, e.g. mice, hedgehogs, shrews, sugar gliders, moles, voles, marmosets, bats, rats and other insectivores.
- Scorpions, praying mantis, centipedes, large insectivorous spiders, etc.
- Human
consumption. Yes some people actually eat them. Freeze for 48 hours first. They will keep in the freezer for a few months if they are properly wrapped in airtight bags or containers. Rinse under running water before cooking. They can also be dried in the oven, and used in place of nuts, raisins and chocolate chips in many recipes. See examples. - Science experiments for school children. (Red
Nova and Leaping
from the Box)
Nutritional Value: (Source: http://www.dbs.nus.edu.sg/research/fish/livefood/mealwm.html)
|
Stage
|
Dry Matter %
|
Moisture %
|
Crude Protein %
|
Crude Fat %
|
Ash %
|
NFE %
|
|
Larvae
|
43.05
|
56.95
|
48.31
|
40.46
|
2.92
|
8.31
|
|
Pupae
|
38.39
|
61.61
|
55.30
|
36.54
|
3.27
|
4.89
|
|
Adult
|
42.10
|
57.90
|
59.43
|
28.33
|
3.16
|
9.08
|
Note: Grubco’s
analysis was 62.44% moisture, 12.72% fat, 20.27% protein, 1.73%
fiber, 1.57% ash, 133 ppm Ca, and 3345 ppm P.
- I have found that sometimes after the worms turn into pupa, they fail to morph into beetles. I wonder if this is due to a moisture or temperature issue.
- Darkling beetles live about three months maximum. (See timetable). If many die all at once, maybe the colony population is synchronized (all about the same age.)
- If the moisture has been too high, there is the risk of fungal contamination. Continue putting beetles into two or three different containers, to ensure that at least one batch is always under good conditions and to minimize large die-offs.
- (Thanks to L Cooksey for getting this information from Professor N. C. Hinkle, Dept. of Entomology, Univ. of Georgia)
Problems with mites: Sometimes a mealworm colony gets infested by grain mites (Acarus sp.) The mitesbmay come from the mealworm supplier, in bran, or litter from
poultry production, and may infest a colony that has been aroundb or a long period of time. Excessive moisture + heat may be a contributor. They are prolific breeders (800 eggs/female) and can withstand temperatures of 0 degrees and still hatch when brought to room temperature. (Another species that can be a problem is the mold mite, Tyrophagus sp.)
The mites are tiny and round, whitish or tan in color, and have eight legs. They may cling to air holes and look like very fine sawdust. Mites can not fly.
If your colony does become infested, the mites will kill the larvae and adults. Destroy the colony (e.g. by freezing) and start over. To prevent mite infestation:
- Jack Finch recommended sterilizing all bran/grain (by microwaving it or placing it in a subzero freezer for several days) prior to adding it to a colony to prevent mite introduction.
- Use only wheat middlings/hulls.
- Create a moat. Place mealworm containers up on legs, and sit the legs inside small glass or plastic jars filled with water or glycerin (which won’t evaporate like soapy water does). This will also keep ants out.
- use a Vaseline band (a 2″ wide band on the outside of the container just after you wash and dry it) to prevent mites from getting into a worm bed.
- Blaine Johnson thought using apples and potatoes as a moisture source may have connected to a mite problem he had, and switched to carrots.
- Store grain that will be used in the future inside tightly sealed containers.
- Kees Van Epenhuijsen (an entomologist from New Zealand) said they achieved 100% mite mortality by using an acaricide paint (Artilin.) Place mealworm containers on top of a piece of plywood painted with the acaricide. This product is NOT available in the United States. Products used to protect beehives from mites (stinky strips put at the entrance to hives) and fumigants (which contain thymol, methol and eucalyptus oil) are too volatile to be used indoors and have no residual action. (I wonder if eucalyptus leaves would work?)
Problems with moths: ![]() Brown moths (typically Indian Meal Moths, a common pantry pest that infests birdseed and cereal) may be attracted to the mealworm bedding. If they get into the farm, they make a sticky web almost like cotton candy. To prevent this, some people store farms outdoors during warmer weather. I put individual containers inside a larger bin with a screen hot-glued to the top. A “pantry-pest” trap using pherhormones can be used to trap adult moths. Microwaving cereals (e.g., 2 minutes), or freezing birdseed and cereals will kill moth larvae that may come in the packaged products. See more control methods.
Brown moths (typically Indian Meal Moths, a common pantry pest that infests birdseed and cereal) may be attracted to the mealworm bedding. If they get into the farm, they make a sticky web almost like cotton candy. To prevent this, some people store farms outdoors during warmer weather. I put individual containers inside a larger bin with a screen hot-glued to the top. A “pantry-pest” trap using pherhormones can be used to trap adult moths. Microwaving cereals (e.g., 2 minutes), or freezing birdseed and cereals will kill moth larvae that may come in the packaged products. See more control methods.
Other species: Tenebrio molitor Linnaeus larvae look like wireworms. There is another species of mealworm called the dark mealworm or Tenebrio obscurus, which matures more quickly than the yellow, and adult beetles lay more eggs. The confused flour beetle (Tribolium confusum) is sometimes referred to as a mealworm. The lesser mealworm (Alphitobius diaperinus [Panzer] is also known as the Litter Beetle, Black Bug or Darkling Beetle. “Superworms” (also called King Mealworms, megaworms, kingworms. Sometimes called Giant mealworms, although these are usually T. molitor treated with growth hormones) are Zophobas morio (sometimes listed as Zoophorbas). They are not treated with hormones, but are naturally larger (around 2-3 times bigger) than regular mealworms. They are native to Central/South America.
Raising Superworms: Superworms (Zophobas morio) also called King Mealworms, King Worms or Megaworms, are used for feeding reptiles, birds, and for bait. Apparently they have less of an exoskeleton than mealworms. It is more difficult to breed superworms, but it can be done. Here is some information that Larry Broadbent gleaned from the Internet and experience. NOTE: Some sources indicate that if an animal (like a bird) consumes a superworm without chewing it, it could bite them in the stomach. Therefore, the head should be removed before feeding them to birds.
- Superworms SHOULD NOT BE REFRIGERATED as it will kill them.
- A 10 gallon Rubbermaid bin holds three hundred worms. Figure that about half will die before they turn into beetles.
- 1-4″ of bedding mix should be placed on the bottom of the bin. Wheat bran bedding mixed with some poultry mash works best. Some commercial growers add brewers yeast to increase growth and add protein content.
- Like mealworms, superworms require moisture – otherwise they will cannibalize each other. This is the dilemma. The worms need the water, but too much water will get into the bedding, and the bedding will ferment, bacteria will grow, and the worms will die. Potato, and/or apple slices work well. The worms “drink” from the slices, and the bedding stays dry.
- Superworms require warmth. Room temperature is fine for keeping the worms, but they need 70ºF and up to breed. Colonies should be kept at 70-80 degrees F, or eggs, worms, and pupa will die and beetles will not reproduce.
- Like mealworms, superworms have four stages: egg, larva (worm), pupa and beetles. The beetles are much larger than mealworm beetles, and change color as they mature. The beetle stage lays eggs.
- To get superworms to pupate, place them under stress. Unlike mealworms, superworms should be placed individually in small plastic containers such as 35mm film containers (stacked on their sides like drums), in order for them to metamorphose. Egg cartons or covered ice cube trays might also work. Include a little bran, cover the container with a cap, and check weekly.
- It will take a +/-30 days for them to pupate. The worms should curl up. This means they are morphing. If they are straight and still, they are dead. Dead Superworms stink.
- Pupae do not eat. If touched or exposed to bright light, they may wiggle.
- When they become beetles (turning from white to reddish color in 24 hours), place them into a bin with bran/chicken feed, and slices of potato or apple quarters. Place 100-150 in a 3 gallon Rubbermaid bin filled with 1-2″ of peat moss.
- About two eggs would fit on the head of a pin. Move beetles to a new container every 10-14 days to keep the beetles or newly hatched worms from eating the eggs. When the beetles die in a few weeks remove them, and leave the bin at 70ºF.
- New worms should be visible in about a month or two after the death of the beetles.
- Some farmers only feed newly molted (white) superworms to reptiles, as there have been cases where adult superworms injured some herps such as chameleons.
Comments on my experience so far raising mealworms: I purchased 5,000 large mealworms in the winter, and it seemed like it took forever for them to pupate. I had to buy a heat lamp because I think temperatures were too low. As a result, the cabbage dries out quickly. It took much longer than the literature said for the pupae to metamorphose into beetles. I made the mistake of not having “siftable” bedding to periodically remove eggs, and I think the beetles ate them. I don’t mind the worm or pupal form, but the beetles gross me out. I find the sound of them crawling around creepy. I have to separate the forms out once every week or two, which is tedious. If you are looking for a fun and exciting hobby, this ain’t it! But it will save money.
References and More Information:
- Feeding/Raising Mealworms – Best of Bluebird_L Classified
- Feeding mealworms by E.A. Zimmerman – includes DIY feeder instructions
- How To Start and Maintain a Mealworm Colony by John Thompson
- Raising Mealworms fact sheet by Ohio State University
- FEEDING MEALWORMS – Solving the Problem of Mealworm Getaway By Nola Aiken formerly at
- The Smith Meal Worm Feeder by Katherine Smith
- Feeding bluebirds by Jan formerly at
- Keeping and Raising Mealworms by Tricia
- Raising mealworms or fishing worms, University of Kentucky
- Raising and Caring for Mealworms – Bruce Johnson and Morgan Davidson
- NABs fact sheet – Feeding Mealworms
- Recipes for human consumption, Food Insect Newsletter
- Mealworms, Fawzi Emad – caring for, training bluebirds to come to feeder
- How To Start And Maintain A Mealworm Colony by John Thompson
- The Bluebird Monitor’s Guide to Bluebirds and Other Small Cavity Nesters by C. Berger, K Kridler
and J Griggs - http://www.dbs.nus.edu.sg/research/fish/livefood/mealwm.html
- Asthma caused by live fish bait by Siracusa A, Bettini P, Bacoccoli R, Severini C, Verga A, Abbritti G., Institute of Occupational Medicine, University of Perugia, Italy.
- Maintaining a Mealworm Farm by Carol Heeson
- The Breeding of Mealworms, RSPB Birds
- Mealworms (and Superworms) by RepVet
- Superworms – Hanley’s Herps with good photos
- The Lifecycle of the Tenebrio Beetle by Ron Salem
- Robyn’s Mealworm Page – good info, also info on king worms
- Larry Broadbent of Canada
- Indian Meal Moths, Ohio State University Fact Sheet
- Breeding Superworms by Tony West
- Mealworm recipes from NY Entomological Society Banquet
- Thanks to Liz Cooksey, who reported on the etymology of the scientific name for mealworms – tenebrio molitor– “tenebrio” comes from “tenebrion — one who lurks in the dark;” and “molitor” means “miller”
mewo is a tasty worm.
I like it.
It has a glabrous epiderm.
I like it.
I peck it ’til it’s good and dead,
And pulp it up, and smash its head,
Then feed my chicks and go to bed.
I like it.
– B. Burdett, of Sunapee NH, 1999